Asp.Net Core Cross-Origin Requests(CORS)
Here we will be learning how to enable CORS in Asp.Net Core Applications, get knowledge about CORS policy and how we can share resources through different origins. The topics we are going to discuss are:-
- What is CORS?
- Create .Net Core WebAPI Application
- Add Packages
- Add Database Connection
- Enable CORS
- Publishing to IIS
- Share Through .Net Core Sample Application
Introduction :
Before going to Sample Application, Lets get the knowledge of CORS so that it will be easy if we go on keeping that in mind. Wikipedia says that ”Cross-Origin resource sharing(CORS) is a mechanism that allows restricted resources for instance fonts on a web page to be requested from another domain outside the domain from which the resource originated.”
In simple words, CORS is a W3C standard that allows a server to relax the same-origin policy. Using CORS, a server can explicitly allow some cross-origin requests whilw rejecting others. CORS is safer and more flexible than earlier techniques such as JSONP.
Now lets get on with CORS creating new application in visual studio.
-
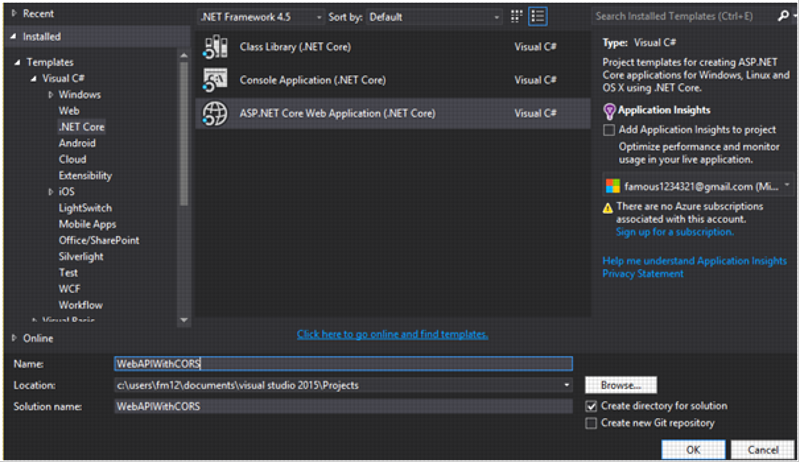
Open Visual Studio 2015. Here I’m using Visual Studio 2015 Update 3.
-
From the top menu click on File.
-
New project
-
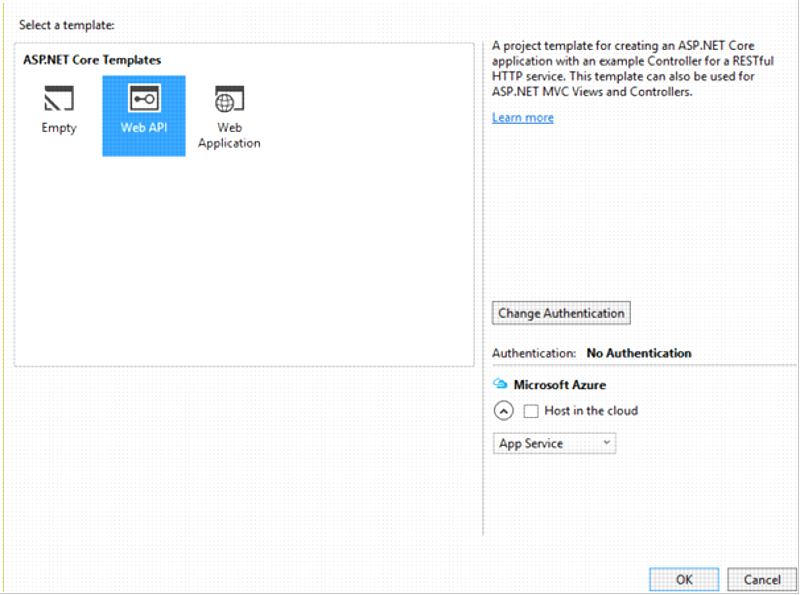
Choose Web API template
-
Leave all other options default.
-
Click on OK and you will see welcome screen in Visual Studio like show in the figure below.
-
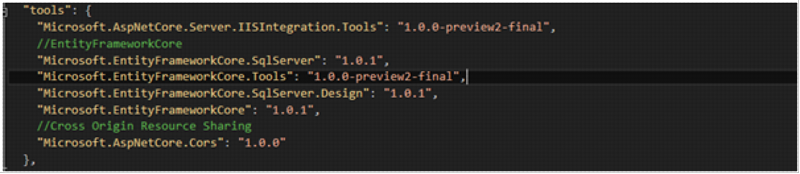
Now we will need to add required packages in our project.You can copy the following code to the project.json file in the Solution Explorer or install it from Nuget Packet Manager.
-
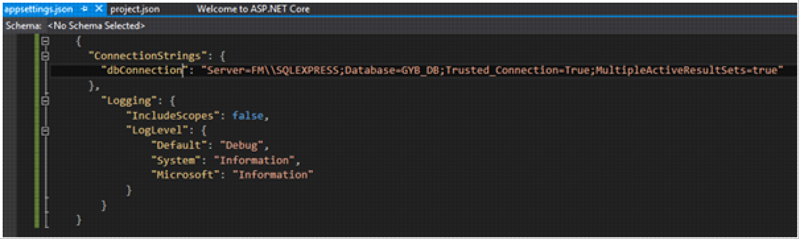
Now lets connect our application to database .Open appsettings.json file from Solution Explorer. Put the connection string and provide the server name and the database name as shown in the figure below.
-
Now lets create a model called PhoneBookContext as shown in the figure below:
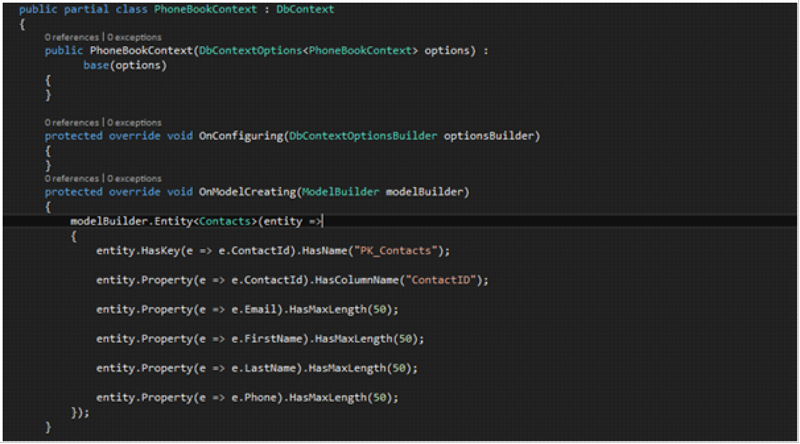
The packages that we aaded in the project.json file will work here.
After the Database Connection , we need to call it in our application middleware in StartUp.cs. Call it as shown in the figure below.

Now we are going to add & enable CORS to our project. To do that again open StartUp.cs file and add the CORS service as shown in the figure below:

Finally we have enabled CORS in our project using an extension method “UseCors”
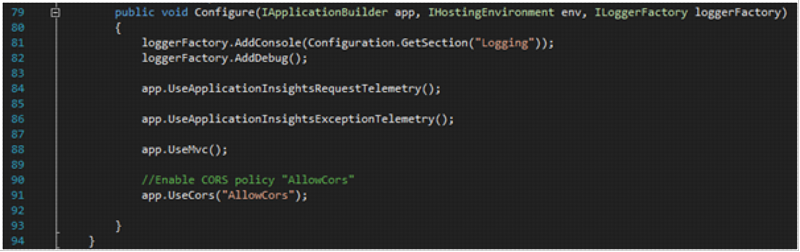
Now Configure the startup.cs with these two lines of codes in Configure method as shown in the figure:
Thats all we have to do to enable CORS.
Now let us dive into WEB API and learn the usage of CORS which we have enabled.
To Get started you will need to use following namespaces :

OR you can press the Ctrl + ‘.’ in the errors and Visual studio will provide an appropriate namespace for you.
API Controller
Here we will be applying specific CORS policies on APIController. Policies can also be applied on a specific action basis or globally for all controllers.
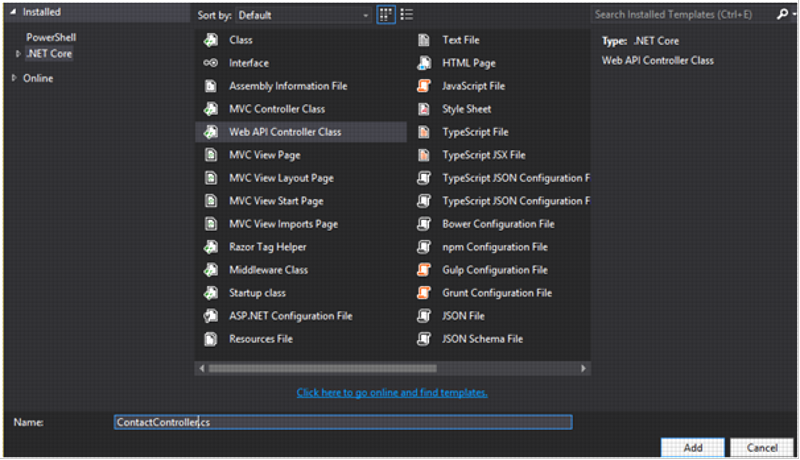
- Make a new WebAPI controller
- Right click on the controller folder.
- Add New Item.
- Search for WEB API Controller
- Provide a name for the controller for instance I’m providing it as Contact.
- Controller.
Now we will be adding the policies in the newly made API Controller i.e in ContactController as shown below:
[EnableCors("AllowCors"), Route("api/[controller]")]
public class ContactController : Controller
{
        private PhoneBookContext _ctx = null;
        public ContactController(PhoneBookContext context)
    {
        _ctx = context;
    }
    // GET: api/Contact/GetContact
    [HttpGet("GetContact"), Produces("application/json")]
        public async Task< object > GetContact()
    {
        List < Contacts > contacts = null;
        object result = null;
        try {
            using(_ctx)
            {
                contacts = await _ctx.Contacts.ToListAsync();
                result = new
                    {
                        contacts
                    };
            }
        }
        catch (Exception ex) {
            ex.ToString();
        }
        return contacts;
    }
    // GET api/Contact/GetContactByID/5
    [HttpGet("GetContactByID/{id}"), Produces("application/json")]
        public async Task< Contacts > GetContactByID(int id)
    {
        Contacts contact = null;
        try {
            using(_ctx)
            {
                contact = await _ctx.Contacts.FirstOrDefaultAsync(x => x.ContactId == id);
            }
        }
        catch (Exception ex) {
            ex.ToString();
        }
        return contact;
    }
    // POST api/Contact/PostContact
    [HttpPost, Route("PostContact"), Produces("application/json")]
        public async Task< object > PostContact([FromBody]Contacts model)
    {
        object result = null; string message = "";
        if (model == null) {
            return BadRequest();
        }
        using(_ctx)
        {
            using(var _ctxTransaction = _ctx.Database.BeginTransaction())
                {
                    try
                    {
                    _ctx.Contacts.Add(model);
            await _ctx.SaveChangesAsync();
            _ctxTransaction.Commit();
            message = "Saved Successfully";
        }
                    catch (Exception e) {
            _ctxTransaction.Rollback();
            e.ToString();
            message = "Saved Error";
        }
        result = new
            {
                message
            };
    }
}
return result;
        }
// PUT api/Contact/PutContact/5
[DisableCors, HttpPut, Route("PutContact/{id}")]
        public async Task< object > PutContact(int id, [FromBody]Contacts model)
{
    object result = null; string message = "";
    if (model == null) {
        return BadRequest();
    }
    using(_ctx)
    {
        using(var _ctxTransaction = _ctx.Database.BeginTransaction())
            {
                    try
                    {
                var entityUpdate = _ctx.Contacts.FirstOrDefault(x => x.ContactId == id);
        if (entityUpdate != null) {
            entityUpdate.FirstName = model.FirstName;
            entityUpdate.LastName = model.LastName;
            entityUpdate.Phone = model.Phone;
            entityUpdate.Email = model.Email;
            await _ctx.SaveChangesAsync();
        }
        _ctxTransaction.Commit();
        message = "Entry Updated";
    }
                    catch (Exception e) {
        _ctxTransaction.Rollback(); e.ToString();
        message = "Entry Update Failed!!";
    }
    result = new
        {
            message
        };
}
            }
return result;
        }
// DELETE api/Contact/DeleteContactByID/5
[HttpDelete, Route("DeleteContactByID/{id}")]
        public async Task< object > DeleteContactByID(int id)
{
    object result = null; string message = "";
    using(_ctx)
    {
        using(var _ctxTransaction = _ctx.Database.BeginTransaction())
            {
                    try
                    {
                var idToRemove = _ctx.Contacts.SingleOrDefault(x => x.ContactId == id);
        if (idToRemove != null) {
            _ctx.Contacts.Remove(idToRemove);
            await _ctx.SaveChangesAsync();
        }
        _ctxTransaction.Commit();
        message = "Deleted Successfully";
    }
                    catch (Exception e) {
        _ctxTransaction.Rollback(); e.ToString();
        message = "Error on Deleting!!";
    }
    result = new
        {
            message
        };
}
            }
return result;
        }
Above you can see all CRUD operation actions with the policies and Routes.
Now let get to the Publishing Our Project To IIS:
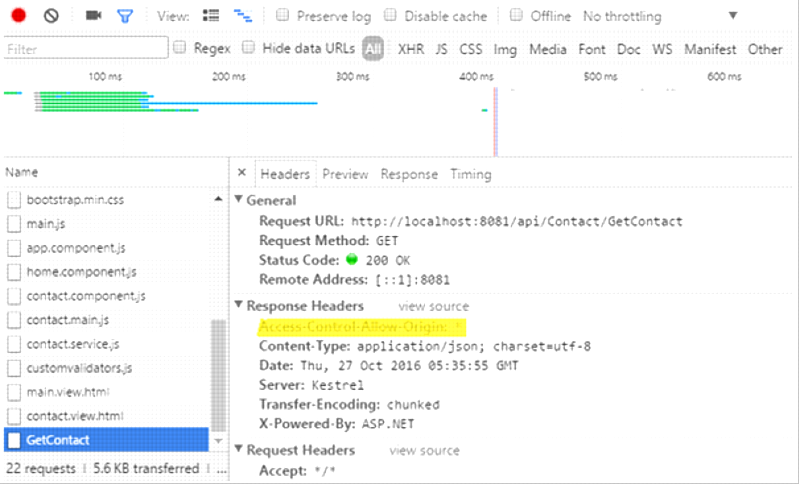
We need to prepare our Server for ASP.NET Core application to host. Get more details on Publishing .NET Core Application. We have used localhost with assigning port 8081, to get accessed by our Sharing application.Let’s browse our application by using http://localhost:8081 URL, as you can see our API is working with response of JSON data.
- We will get our values in JSON format.
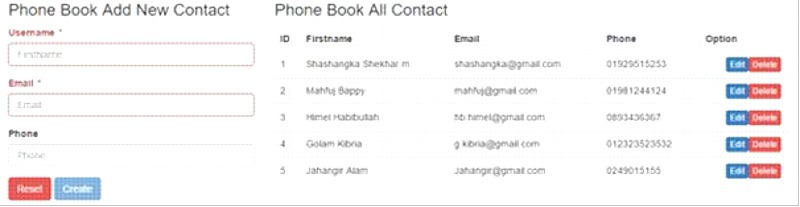
Now is the time to access the shared resource. I have added an existing sample application to this solution. Given below is the simple change that I have made to access the resource via API from different origin.
Share Resource
Here, we have tried to access the resource through http://localhost:8081 but a server error occurred, as you can see below.
![]()
After enabling CORS we have successfully been able to access the shared resource through Web API.
You will get the output like this: